
Table of Contents
KRIYA Booking System provides General Terms and Conditions & WAIVER feature to its Clientele, which can be changed according to the client’s preference.
Let us see where we can Find and Edit this Setting in KRIYA #
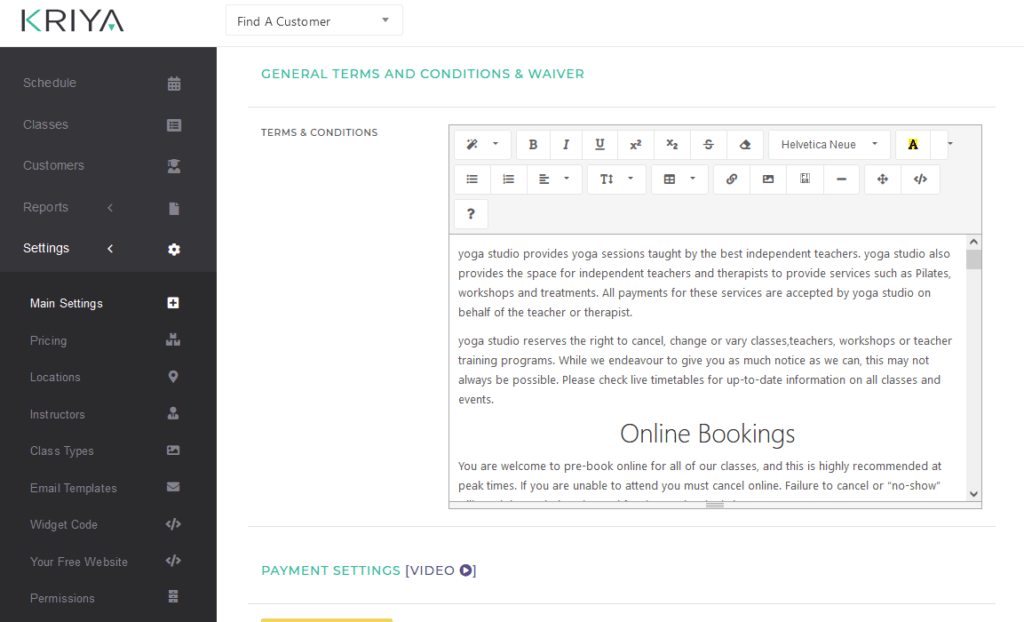
- Log in to KRIYA, and find and click on Settings in the left Main Menu.
- Now click on Main Settings, Scroll down to “General Terms and Conditions & WAIVER“.
In the Terms & Conditions Text Box, add things you want students to see in the terms and conditions on the Sign-Up Page. Scroll down and click on Edit and Save to save these changes.
Where can your Students See & Accept the Terms and Conditions #
- Terms and Conditions, once created and saved, will appear on the Sign-Up page for the Clients/Students.
- There will be a Check Box with highlighted “terms and conditions” green text above the Sign-Up button.
- Students can read the terms by clicking on that green text and then tick the check box to accept them.
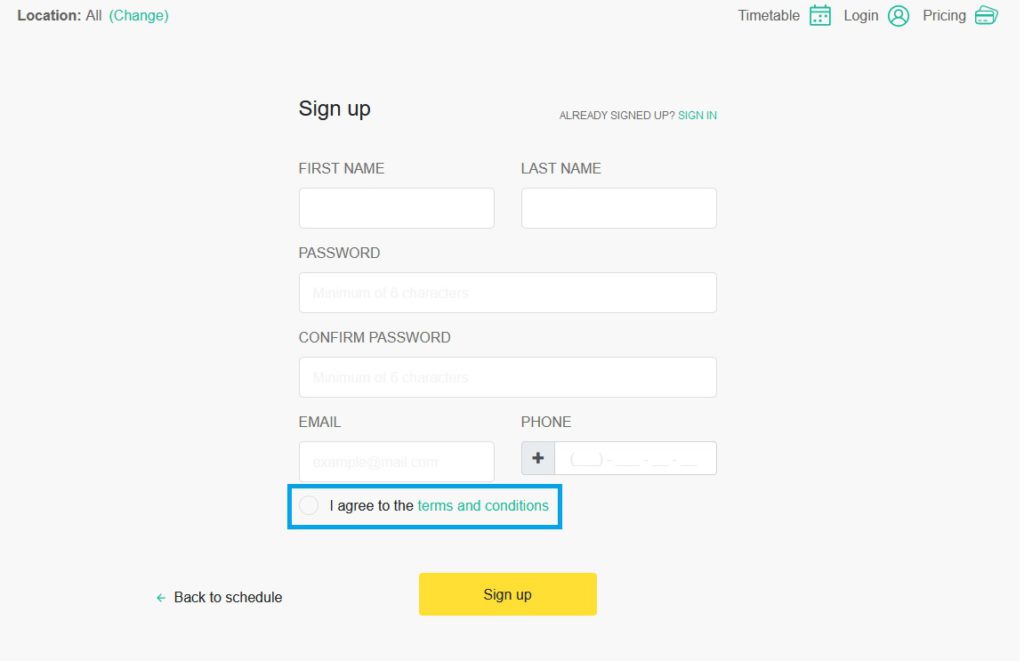
Note: Clients must tick/check these Terms and Conditions when signing up.


