
When you create a CoreBookings studio account, the dashboard guides you through a short setup checklist. Complete all four steps and clients can find your studio, buy passes, and book classes.
This article lists the exact steps shown in the dashboard. For a broader tour of settings and features, see Getting started: guide to set up your account.
Where to find the checklist #
After you log in as a studio owner or admin, you are taken to the setup checklist. You can also open it any time from:
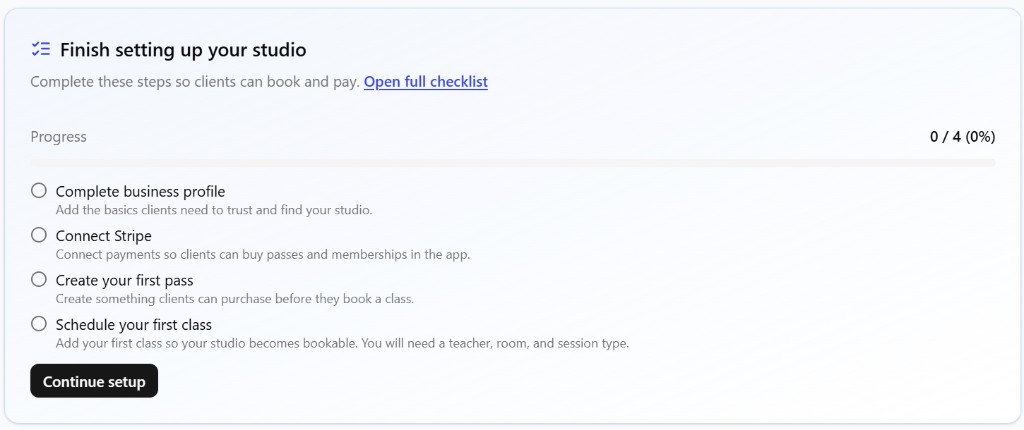
- Dashboard: the Finish setting up your studio card shows your progress. Click Continue setup or Open full checklist.
- Onboarding: in the left sidebar while setup is incomplete. The page title is Get your studio ready.
The four activation steps #
CoreBookings tracks four steps. Each one links directly to the right place in the dashboard.
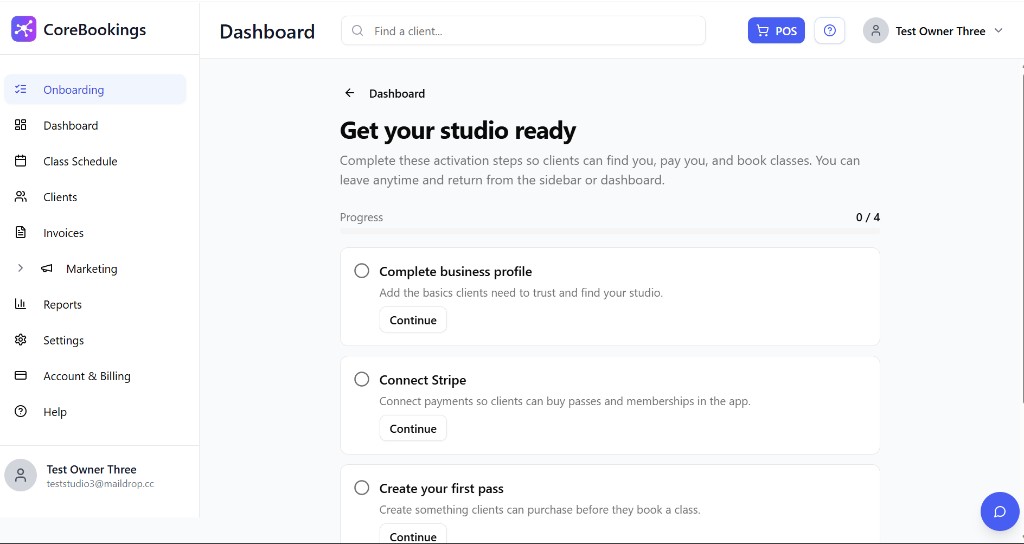
1. Complete business profile
Where: Settings → Business
Add the basics clients need to trust and find your studio. The checklist marks this step complete when your studio has a phone number and address saved.
- Phone: Settings → Business
- Address: Settings → Location
2. Connect Stripe
Where: Settings → Payments
Connect payments so clients can buy passes and memberships in the app. On the Payment Settings page, click Connect Stripe Account and follow the Stripe prompts. The step is complete when your Stripe account shows as Connected.
3. Create your first pass
Where: Settings → Passes
Create something clients can purchase before they book a class. Add at least one pass or membership on the Passes & Memberships page.
4. Schedule your first class
Where: Class Schedule
Add your first class so your studio becomes bookable. You will need a teacher, room, and session type. If you have not set these up yet, add them first under Settings → Teachers and Settings → Class Types, then open Class Schedule and create a class with a future date.
When all four steps are done, the dashboard shows Your studio is live.
After your studio is live #
Once the checklist is complete, the dashboard suggests a few useful next actions:
- Copy public studio URL
- Add schedule to website (Settings → Add to Website)
- Invite first clients (Clients page)
If your public studio URL is not set yet, use Set public studio URL in Settings → Business first.
Optional settings #
These are not part of the activation checklist, but you may want to configure them soon:
- Waiver (Settings → Waiver): add your studio waiver if you want clients to accept it before booking.
- Notifications (Settings → Notifications): choose which emails your studio sends.
- Coupons (Settings → Coupons): create promo codes for passes or memberships.
Need help? Browse the help docs or email support@kriya.com.au.


