
CoreBookings is designed for self-service setup. Most studio owners can go live the same day they sign up, often in under an hour if they have their studio details, pricing, and schedule ready.
There is no manual approval step from CoreBookings before clients can book. Your studio becomes bookable as soon as you complete the four activation steps in the dashboard.
The short answer #
- Same day: most studios complete setup and accept their first online booking within a few hours
- Under 60 minutes: realistic if you already know your class schedule, pass pricing, and studio address
- No waiting period: there is no publish queue or review from CoreBookings before you go live
If you are migrating from another booking system or need help importing clients, that is separate from going live. You can start taking new bookings while client data is migrated in the background.
What go live means #
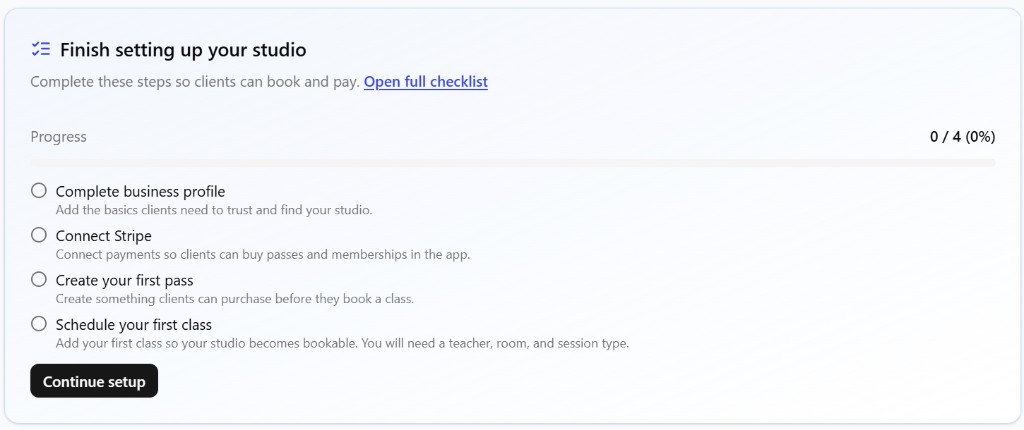
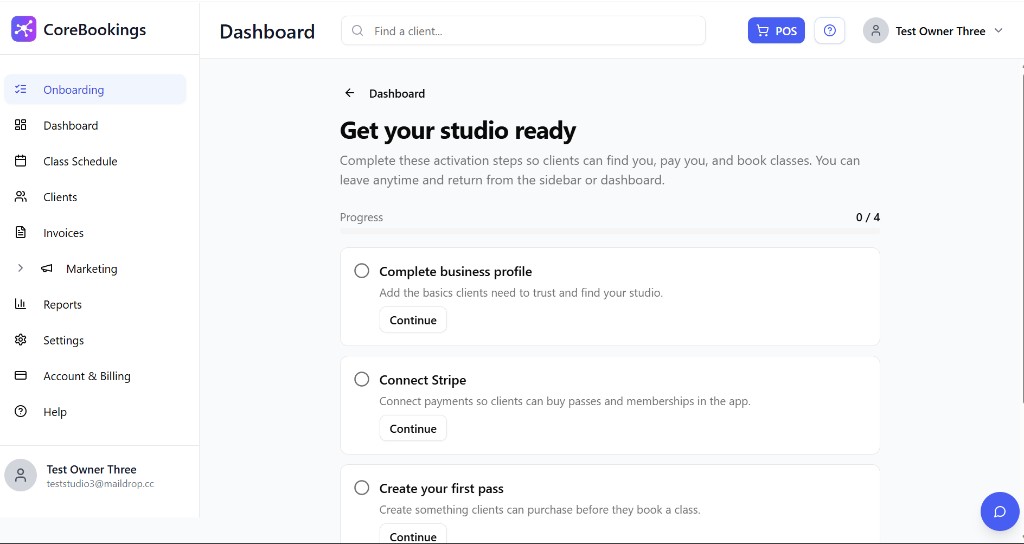
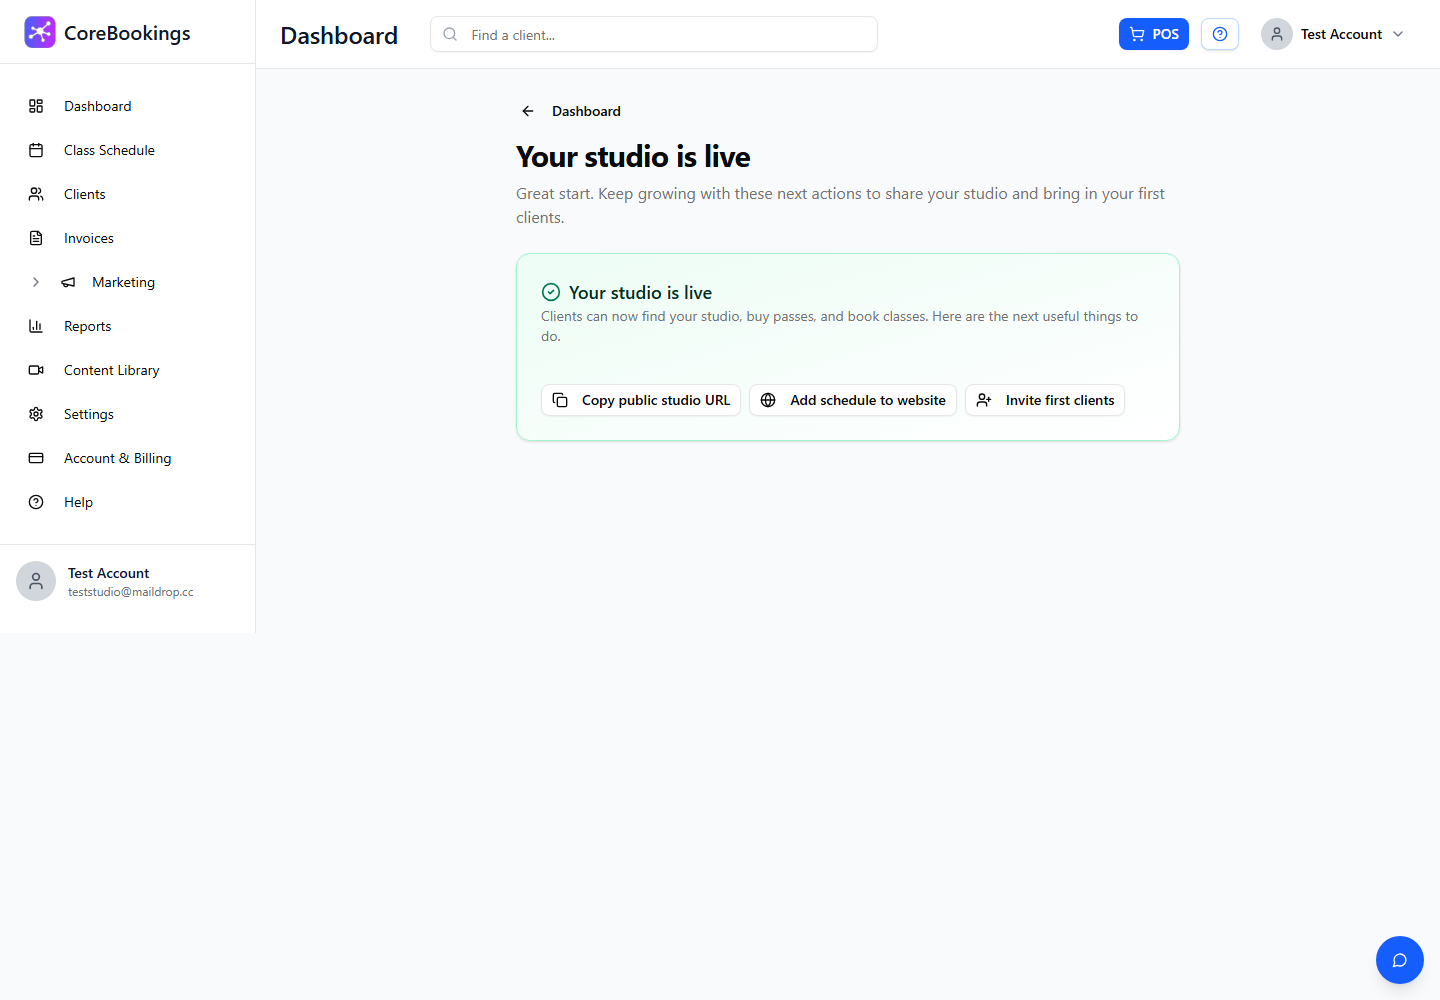
In CoreBookings, go live means you have completed the four activation steps tracked in your dashboard checklist. When all four are done, the onboarding page shows Your studio is live and clients can find your studio, buy passes, and book classes.
The four steps are:
- Complete business profile
- Connect Stripe
- Create your first pass
- Schedule your first class
You can track progress from the Finish setting up your studio card on the Dashboard, or open the full checklist from Onboarding in the sidebar (page title: Get your studio ready).
Scheduled classes appear on your public booking page as soon as they are created. There is no separate publish button for your timetable.
For the full step-by-step breakdown, see the checklist to set up your account.
Typical timeline by step #
These are rough guides based on what most studios do. Your time may vary depending on how much you have prepared in advance.
1. Complete business profile (5 to 15 minutes)
Where: Settings → Business and Settings → Location
Add your studio phone number in Business Settings and your address in Location Settings. The checklist marks this step complete when both are saved. Also set your Studio URL slug so clients have a public booking link.
2. Connect Stripe (5 to 20 minutes)
Where: Settings → Payments
Click Connect Stripe Account and complete the Stripe onboarding flow. Once connected, the page shows Stripe Account Connected and clients can purchase passes online.
Stripe may ask for extra identity or business verification in some cases. Clients can usually pay as soon as Stripe shows connected, even if payout timing is still being finalised by Stripe.
3. Create your first pass (5 to 15 minutes)
Where: Settings → Passes
Create at least one pass or membership clients can buy before booking. Set visibility to Public - Visible to customers for self-service purchase.
4. Schedule your first class (10 to 30 minutes)
Where: Class Schedule
Add your first future class. You will need a teacher, room, and session type set up first under Settings → Teachers, Settings → Location (rooms), and Settings → Class Types. If those are ready, scheduling a class is quick.
CoreBookings onboarding emails refer to getting your schedule live in about 10 minutes once you are in the Schedules area.
What can slow you down #
These are the most common reasons setup takes longer than a single session:
- Stripe verification: Stripe may request additional documents before your account is fully verified. This usually does not block clients from paying, but check Settings → Payments if you see a pending status.
- Teachers, rooms, or class types not set up: you need at least one of each before you can schedule a class. Allow extra time if you are configuring these for the first time.
- Complex pricing: studios with many pass types, memberships, and term dates may spend longer on Settings → Passes before going live.
- Client data migration: importing clients from another system is handled separately. Email support@kriya.com.au with your export if you need help. You can still go live and take new bookings while migration is in progress.
- Website embed: adding the schedule widget to your website (Settings → Add to Website) is optional and can be done after go live.
CoreBookings does not require a support call or onboarding call before your studio can accept bookings.
After your studio is live #
Once the checklist is complete, the dashboard suggests a few useful next actions:
- Copy public studio URL from Settings → Business or the onboarding page
- Add schedule to website via Settings → Add to Website
- Invite first clients from the Clients page
Share your booking link on your website, social media, and in class announcements so clients know where to book. See How can clients start booking classes? for more detail on sharing your booking page.
Related help #
- Checklist to set up my account
- Getting started: guide to set up your account
- How can clients start booking classes?
- Setting up Stripe
- Migrating or importing from another booking system
Need help? Email support@kriya.com.au.


